FAQ’s
How do I create my trial account?
First you will enter your First Name, Last name as well as your email address. This data will be used to start the trial account as well as create an agent profile in the help desk. Next, add the company or help desk name to create the subdomain for the trial account. Please note, the trial account created will become the active account once subscribed so no configurations of the trial are lost! Once all details are entered, click the green “Get Started Now” button to activate the trial. 
There are 2 scenarios that could happen from there:
Scenario 1:
User Clicks Confirmation Email First
- Go to Almost Done page
- Form pops up or user clicks link to finish setup
- After submitting, refresh to login page
- After logging in, goes to account
- All done!
Scenario 2:
User clicks to account setup first
- Go to ‘Confirm your email’ + set up account link
- After setting up account, show confirm your email screen
- Anywhere clicked goes to that page until they go to confirmation url
- Going to confirmation url shows confirmed page
- All done!
From there, the Agent is logged in and can go to any tab they want to.
What’s the difference in the levels of subscription?
There are 3 differences between the 3 subscription levels available: Attachment Size Limit, Plugins Available and Choice of Data Center Location.
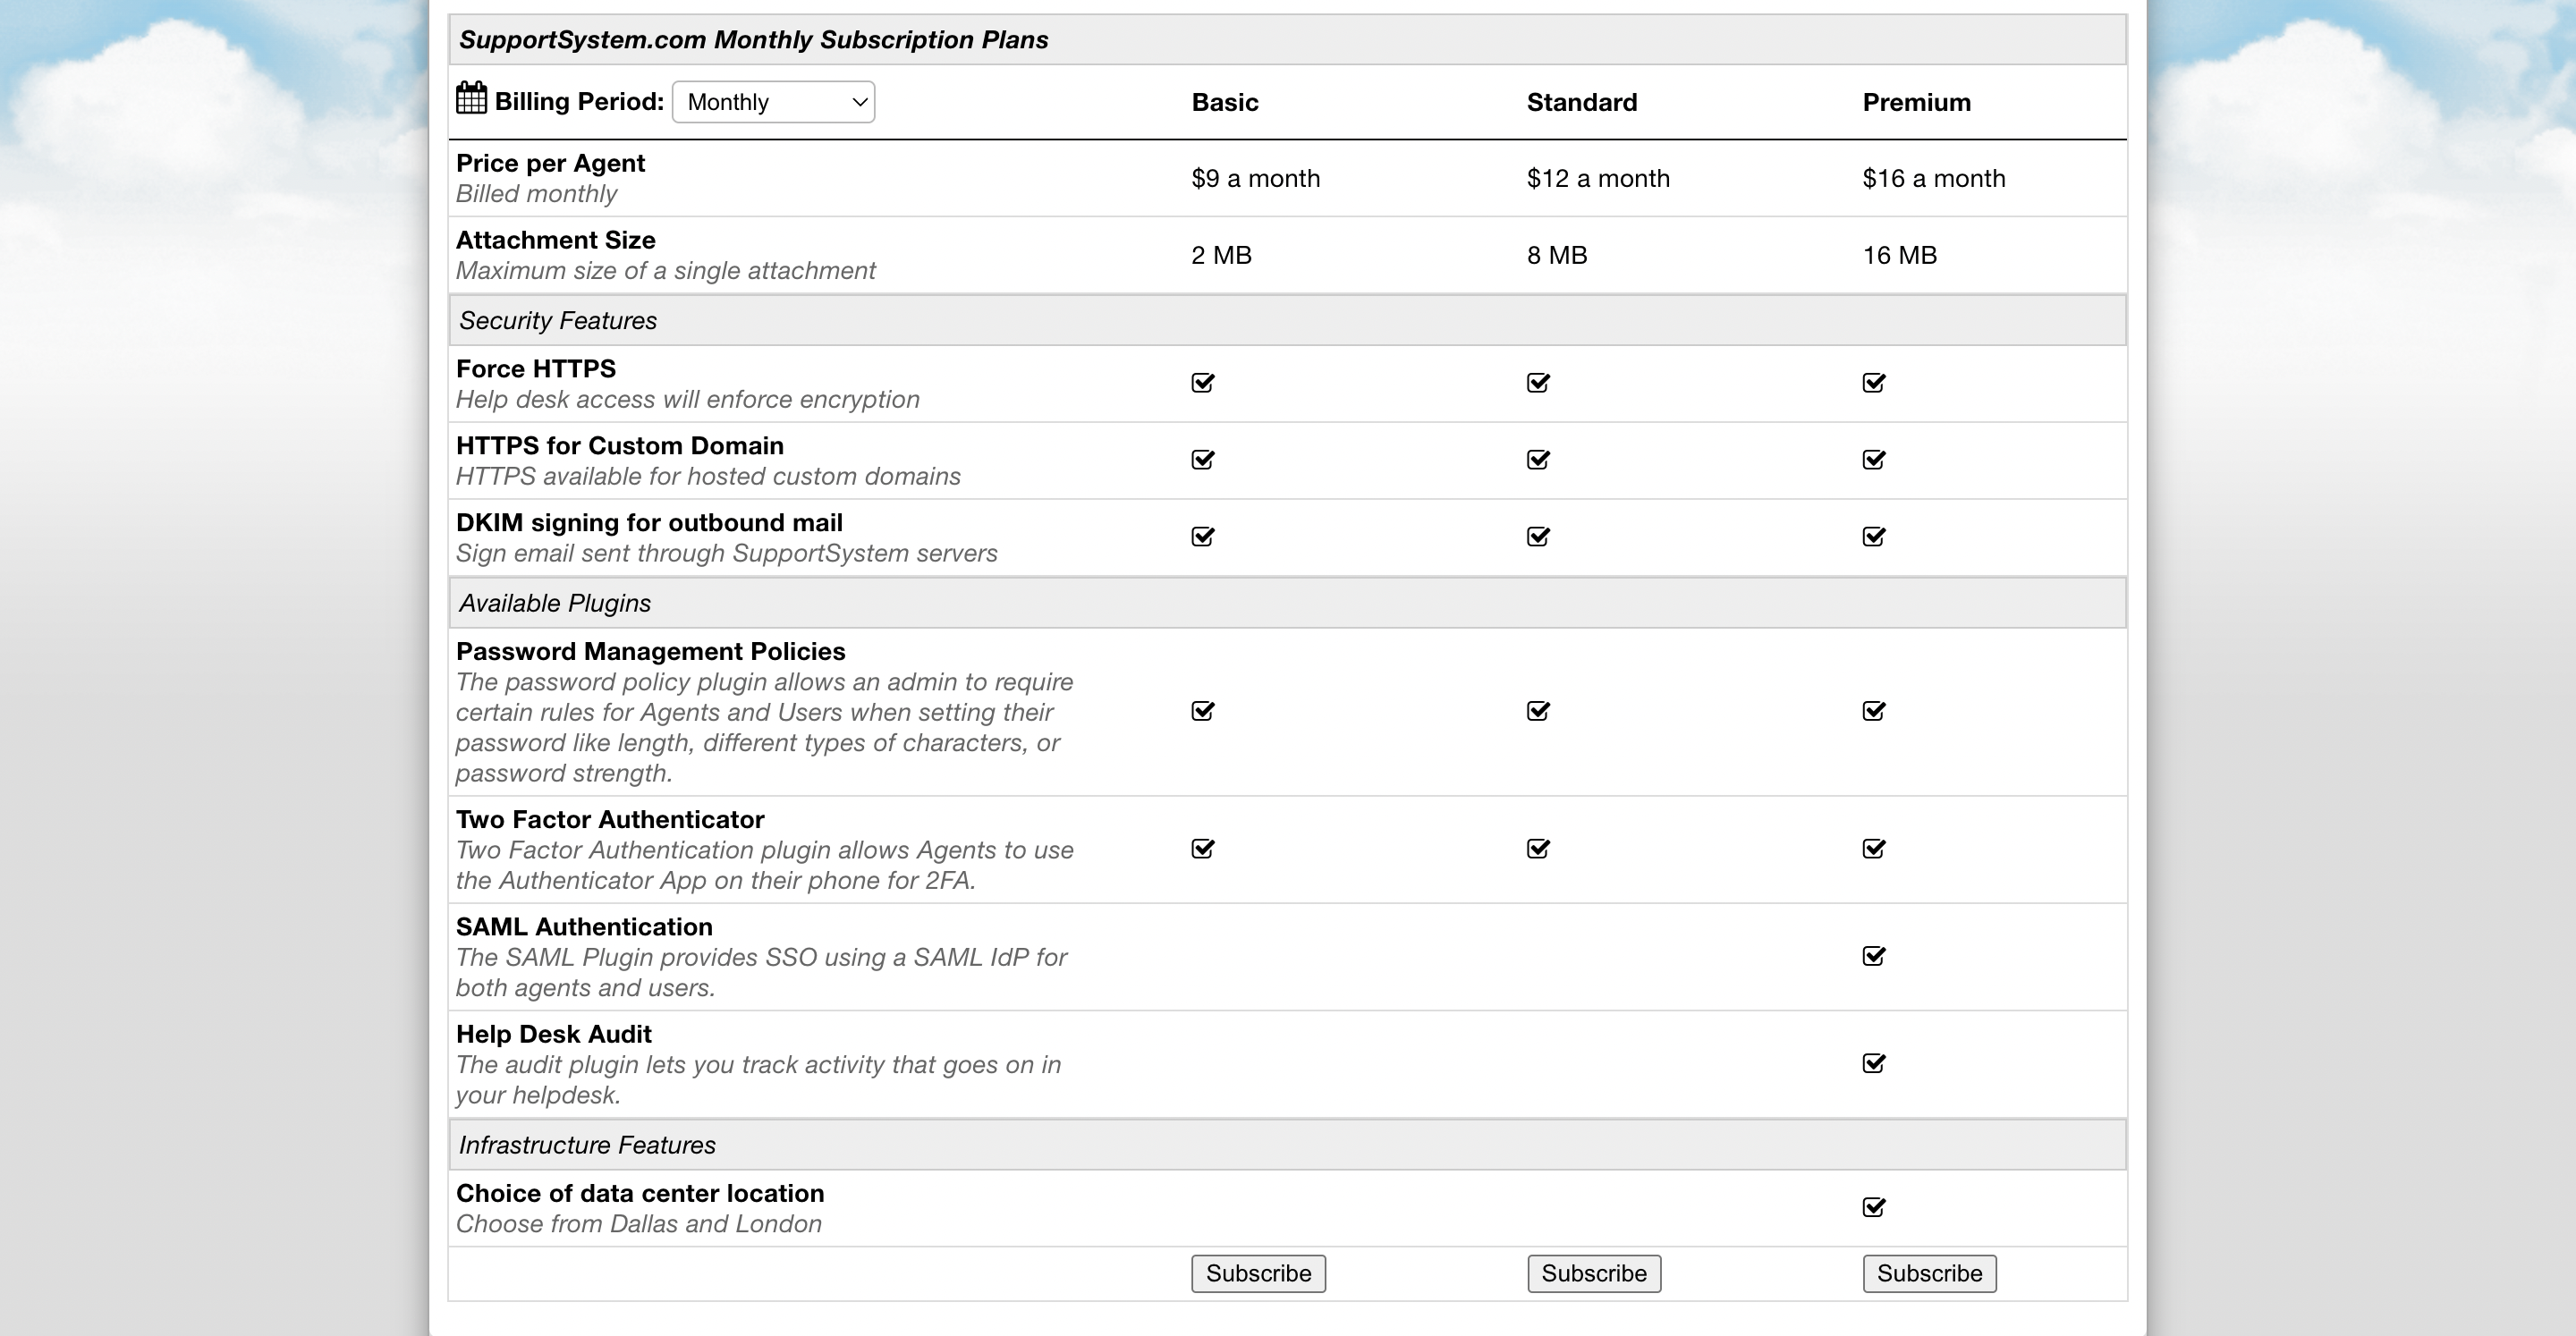
Attachment Size Limit
The attachment size limit is per each attachment; you can have an unlimited number of attachments. Basic Plan (2MB), Standard Plan (8MB), Premium Plan (16MB).
Plugins Available
All subscription levels include the Password Management Policies Plugin and the Two Factor Authenticator plugin.
The Premium subscription level additionally includes the SAML Authentication plugin, as well as a helpdesk audit plugin.
Choice of Data Center Location
By default in SupportSystem you are hosted from our Dallas, TX Data Center; with the Premium subscription level you have the option to be hosted from the London Data Center instead.
Why can’t I see tickets that have been created?
You don’t have access to the Department the tickets are being routed to so you simply need to expand your Department Access.
Agents will only see tickets that they have Department Access to in the help desk. When initially adding Agents, you will set a Primary Department to give them access to as well as assign a set of permissions to those tickets. To give them access to additional Departments, you will need to go to their Agent account and manage the access.
Go to Admin Panel > Agents Tab > Click on the Agent’s Name > Go to the Access Tab.
Under the Extended Access section, you will add all additional Departments that you want the Agent to have access to.
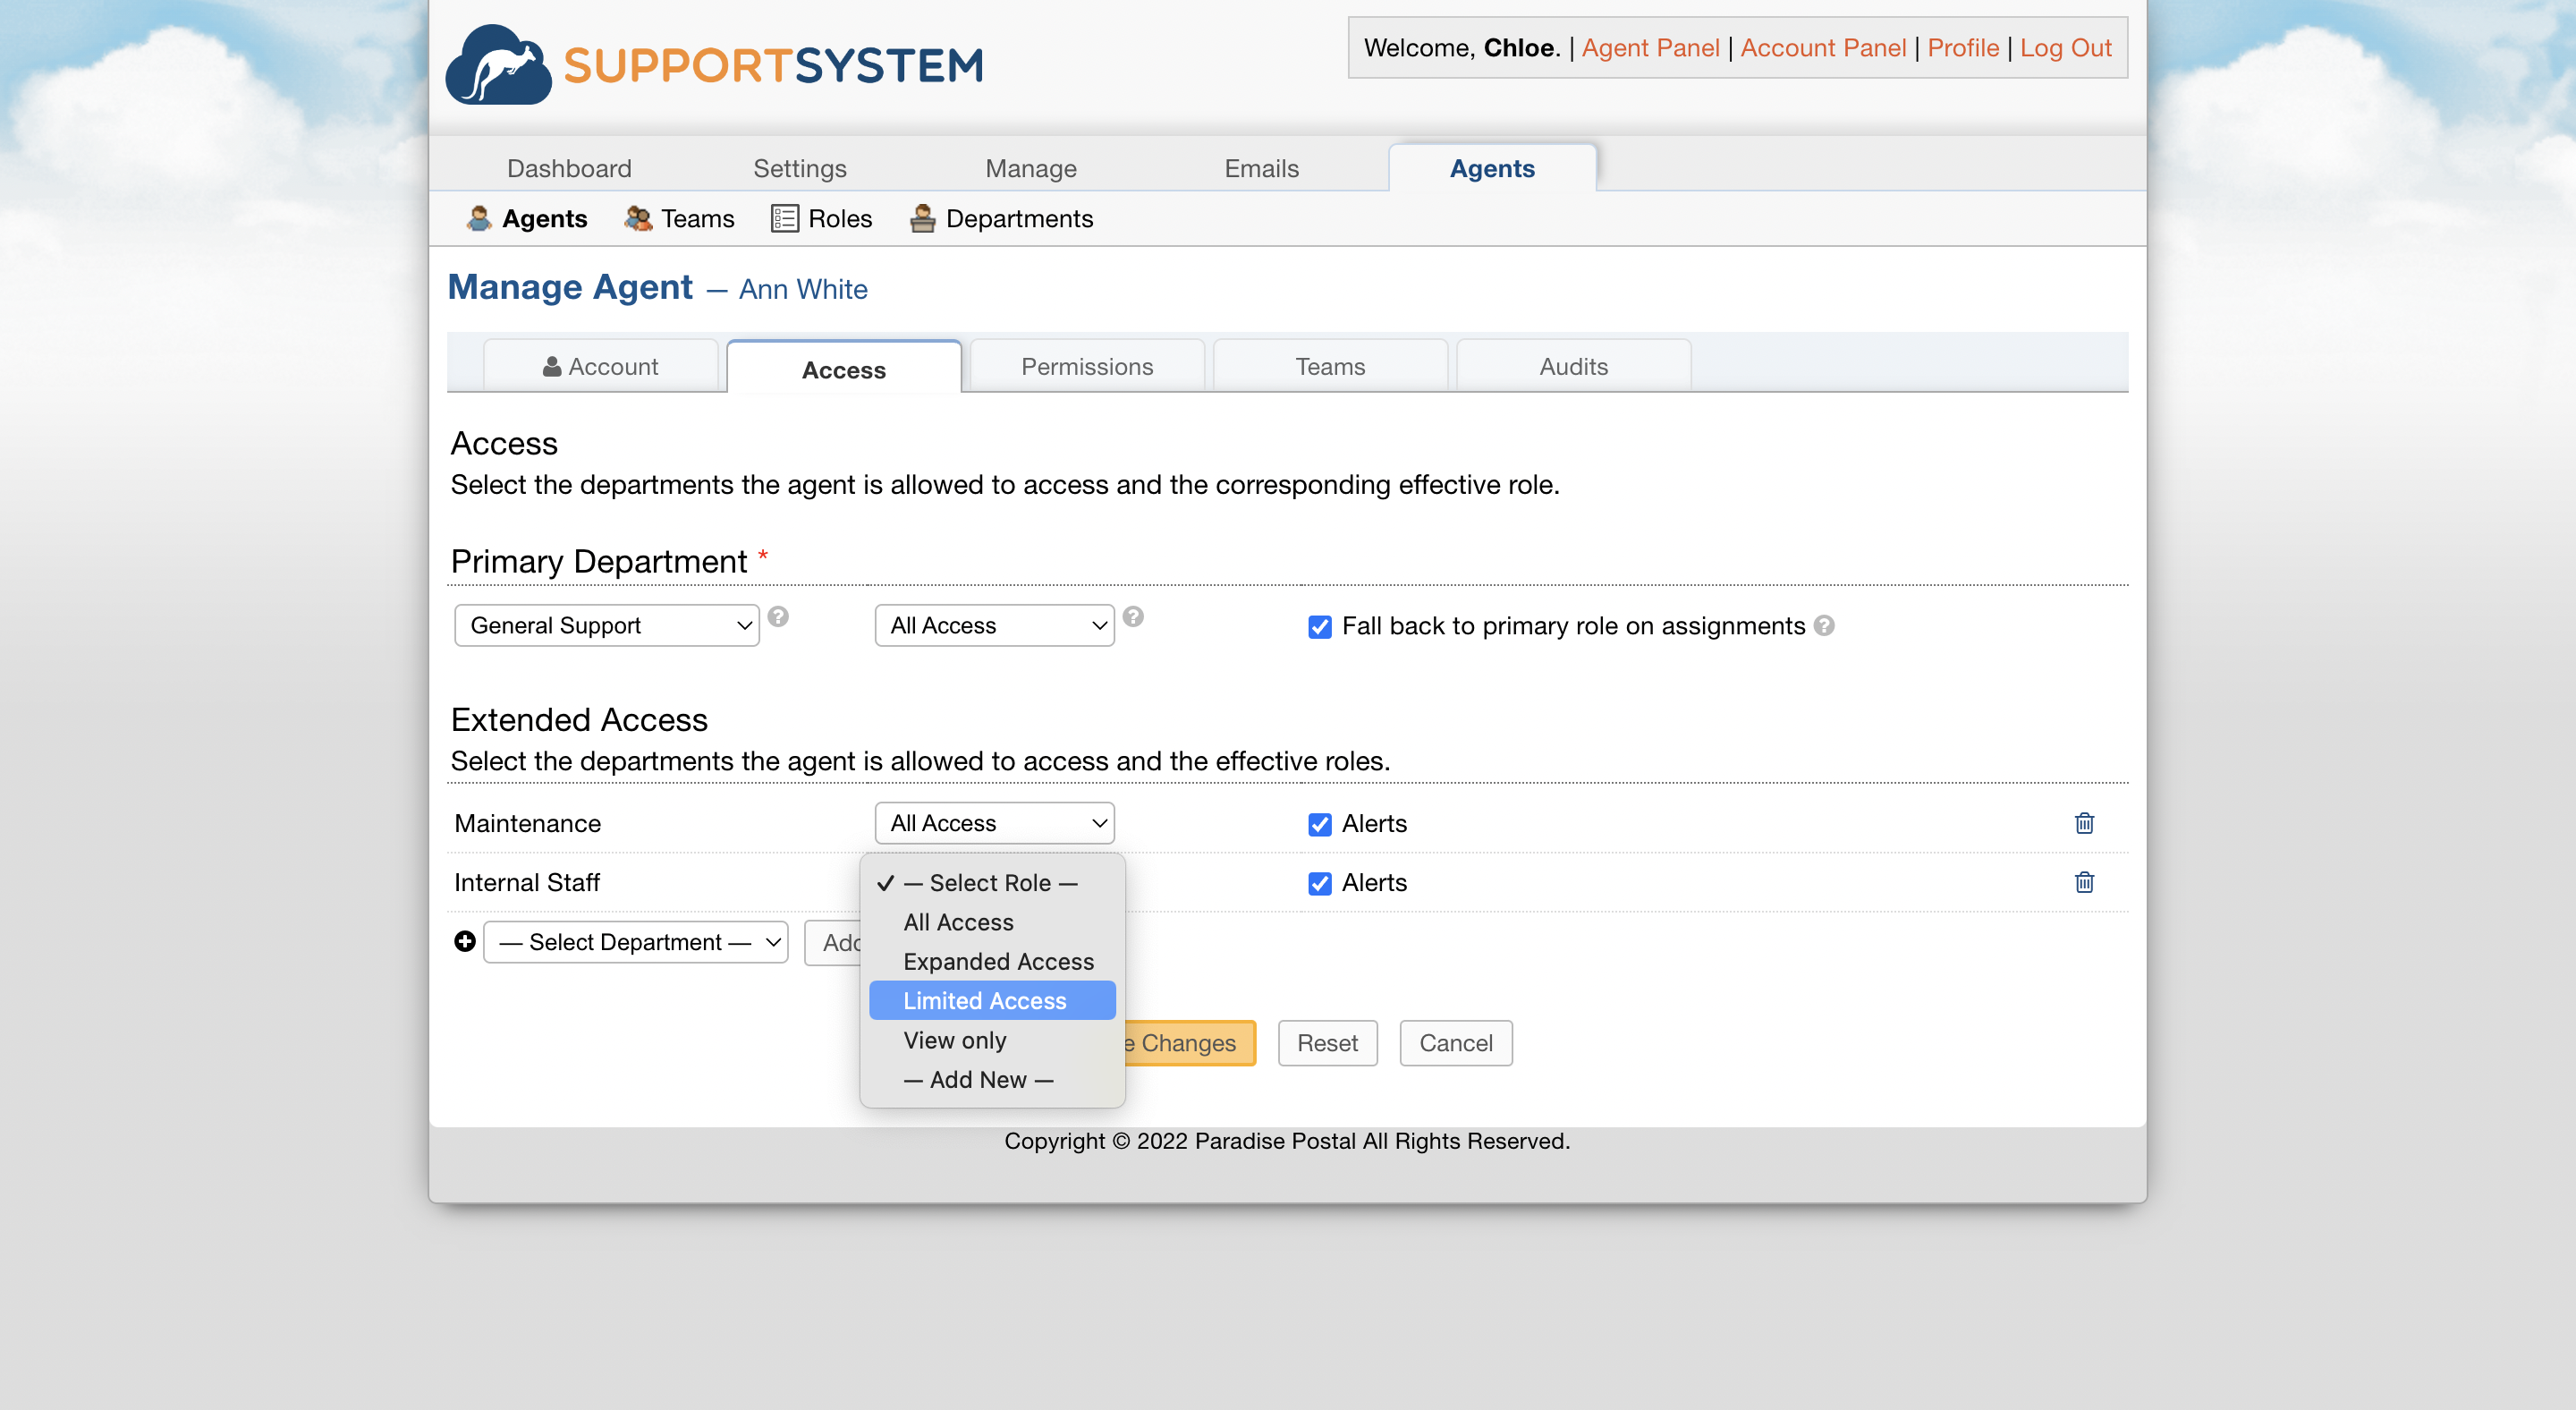
Select the Department, then select ‘Add’. Next, you will set the Role, which determines their permissions in each Department. Roles can be configured and expanded from the ‘Roles’ section of the Agent’s Tab.
From here you can also individually disable alerts for the Agent for each Department by unchecking the box for Alerts.

After gaining access to the Departments, the tickets will now be visible from the ticket queue.
Note: If you are adding a new Department to the help desk, you can easily expand Agent access to the department tickets from here as well.
Why am I not receiving alerts, even though they are enabled?
Alerts are globally enabled for Agents at Admin Panel > Settings > Tickets > Alerts and Notices.
If you’ve enabled alerts globally, but some Agents are still not receiving them, there are a few things to review:
Alerts for Department Members with Extended Access
Some Departments may be configured to only send Alerts to Primary Department members; in this case, Agents with Extended Access to the Departments will not receive alerts. An Agent’s Primary Department is the first Department that you give them access to. When you give an Agent access to additional Departments, that is called Extended Access.
If you want alerts to be sent to all Department members, go through each Department and configure the Alerts and Notices Recipients to be sent to “Department and extended access members”.

Once changes are saved, Alerts will be sent to all Department members of the Department.
Local enabling of Alerts in Agent Account
Alerts can be disabled for each individual Department an Agent has access to. You can ensure these alerts are enabled by going to the Admin Panel > Agents Tab > Click on an Agents Name > Go to the Access Tab; ensure the box is checked for alerts next to each Department.